
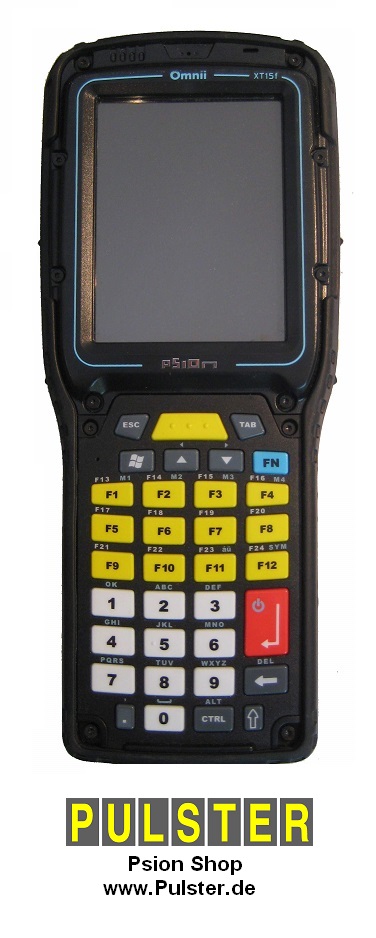
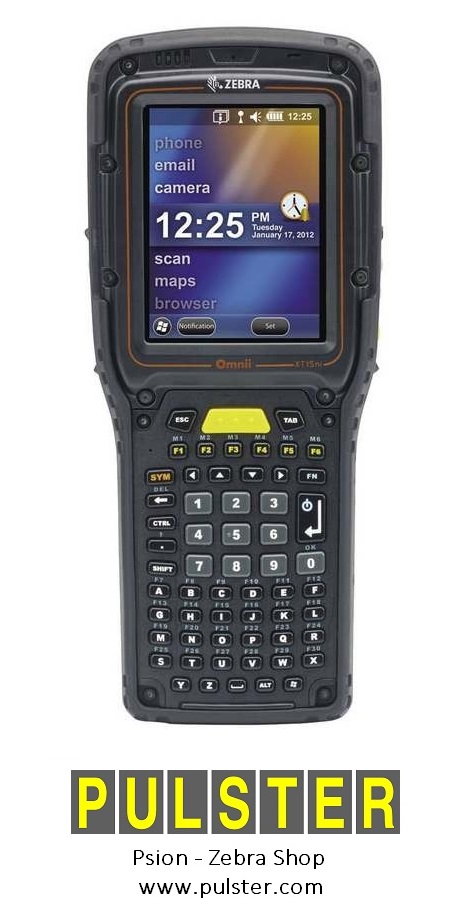
Zebra
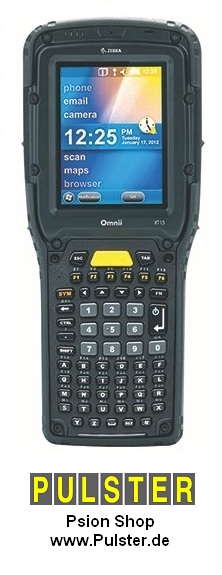
Omnii XT15
FAQ - Frequently
asked questions
![]()
© EDV Pulster, Germany - www.pulster.de -
info@pulster.de
|
- What variants of the Omnii are available ?
|
Model |
XT15 |
XT15f |
XT15ni
non-incentive |
|
|
 |
 |
|
| Variant |
Standard
|
- XT15f: freezer variant |
XT15ni: non-incendive (UL Class I, Division 2
(Group A, B, C, D); T6)
|
| Specifications | |||
| Product support |
- What are the main specifiations of XT15 ?
|
XT15 |
|
| CPU / memory | TI ARM 800Mhz / 512mb RAM, 1gb ROM |
| Display | 3.7" Color touchscreen |
| OS systems |
option #1: Windows CE.net 6.0 (link) English, French, German, Spanisch, Italian, Chinese, Korean and Japanese. Language can be changed within running system. OS images are available on the Support site. |
| scanner | wide variety of scanners and 1D/2D imagers for installation on backside or top side of unit, with pistolgrip |
| Wireless options | Wifi 802.11a/b/g/n, GSM 3.8G HSPA+, Bluetooth, GPS, RFID, Narrowband |
| Wired options | USB, USB host, Ethernet, serial RS232 |
| keyboard |
2x alphanumeric, 4x numeric options - link: KEYBOARD |
| Features | Accelerometer, Compass |
| IP rating | IP 65, IP 67 |
Besides there are these variants:
- XT10 (7545XV): former variant of XT15, with slower CPU, less RAM,
and Wifi 802.11g/b only, Windows CE 6 and IP65. First variant of Omnii family,
replaced of XT15. Specifiations,product
support: Zebra
XT10
- RT15 - 100% identically to XT15, but with an IP rating of 65 instead
IP67, otherwise the very same hardware, Specifiations,
Support.
- 7545MBW: a XT15 with a specific configuration for at&t.
All informations given here for the XT15 model is valid the same for these variants.
Accessories is fully compatible.
- what do I need to start with ?
 The
Omnii comes with a battery (ST3003) only, no other accessories are included
in the box. For start working with the unit you need at least a charging option,
see below please. The Omnii is high modular, a variety of internal connectors
allow Barcode Scanner, serial ports, radio cards and much more to be connected
directly into the body of the Omnii maintaining its IP and Drop ratings.
The
Omnii comes with a battery (ST3003) only, no other accessories are included
in the box. For start working with the unit you need at least a charging option,
see below please. The Omnii is high modular, a variety of internal connectors
allow Barcode Scanner, serial ports, radio cards and much more to be connected
directly into the body of the Omnii maintaining its IP and Drop ratings.
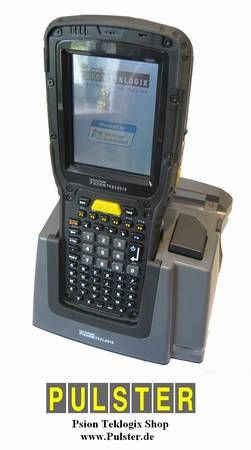
- charging options ?
There is no power port on the Omnii, so you can not simply plug a power adapter
on it. Choose one of these options:
1. Docking station: The desk docking station (ST4002 with USB, ST4003
with USB+Ethernet or quad-unit station ST4004) can charge a spare battery as
well as charge the battery inside in the unit.
2. Battery charger (ST3006): Can charge up to six batteries externally.
3. Snap On adapters: These adapter clips provide charging port for the
unit: WA4000 with power adapter (ST1050 (wall) oder ST3113 (CLA)), adapter WA4001
with powered USB port and adapter WA4005 with powered serial port.
4. Vehicle charging options: powered Vehicle Cradle (ST1002): This cradle
charges the plugged Omnii unit with the on-board power supply (CLA power adapter
CA3002 needed, or power cable CA3001 + CA1210).
- battery options ?
 All
Omnii models use the battery ST3003 (former ST3001). With 5000mAh capacity it
is one of the most powerful available in the handheld market. Charging time
is 3.5h, working time 10 to 19 hours (depending on usage) and 50 hours suspend
time. Life time of battery is 3 years/300 charging cycles.
All
Omnii models use the battery ST3003 (former ST3001). With 5000mAh capacity it
is one of the most powerful available in the handheld market. Charging time
is 3.5h, working time 10 to 19 hours (depending on usage) and 50 hours suspend
time. Life time of battery is 3 years/300 charging cycles.
Besides all Omnii's have a backup battery. It will remain data while replacing
main battery. It is soldered to mainboard and not user-changeable.
You can extend battery life configuring power management
accordingly (/Start/Settings/ControlPanel/Display & Power): suspend power
settings, reduce backlight, keypad brightness. If not needed, disable Bluetooth,
GSM/GPRS, SD-Card Slot. Teklogix recommends to use default power managment settings
to get the best battery life.
- wired communication options ?
| USB |
Option 1: docking station ST4002, ST4003: the docked Omnii connects via
USB to any desktop PC. Besides there is a USB Host port. Option 2: snap module ST4001 - this adapter clip provides a micro-USB port to communicate via linkcable (PX3058) with a PC. Also charging the unit via this USB port is possible. Besides it provides a standard USB port to connect external devices |
| USB Host |
Option 1: docking station ST4002, ST4003: both docking stations provide a USB port to connect external USB devices. Besides the docked Omnii unit connects via USB to any desktop PC. Option 2: snap module ST4001 - this adapter clip provides a standard
USB port to connect external devices. Besides it provides a micro-USB
port to communicate via linkcable (PX3058) with a PC. Also charging the
unit via this USB port is possible. Option 3: adapter cable CA3001 - it is used with the powered VIC cradle (ST1002) and provides two USB ports. |
| Ethernet |
Option 1: docking Station ST4003 - it provides Ethernet 10base port (besides USB and serial port). Quad docking station ST4004 provides 10/100 Base-T Ethernet port. Option 2: adapter WA4070 - it will be attached to the USB-port of the single dockingstation and will provide an Ethernet port. Supported from WinMobile 1.3.20088 and WinCE 1.6.16391” or later. |
| serial RS232 |
Option 1: docking Station ST4003 - it provides serial DB9 port (besides
USB and Ethernet 10base port). Option 2: snap module ST4005 - this adapter clip provides a serial DB9
port. It can be used for data communication as well as for charging the
unit (powered serial port). Option 3: adapter WA4015 - it attaches to the USB-port of the dockingstation and provides serial DB9 RS232 port. |
- wireless communication options ?
| Technology | Psion part no. | suitable for Omnii | |
| GSM |
2,5G GPRS, EDGE, GSM quad band |
RA3045-GPS with endcap ST95xx |
XT15 only |
| 3.8G HSPA+ five band |
RA3050-GPS |
XT15 only | |
| Wifi | 802.11b/g | - | integrated on all XT10 |
| 802.11a/b/g/n, WPA2, 802.1X | - | integrated on all XT15 | |
| Infrared | none | - | none |
| Bluetooth | V2.0 + EDR, coexistence with Wifi | - | integrated on XT10, XT15 |
| GPS | optional SIRF III receiver | RA3060 with endcap ST94xx / ST95xx / ST 96xx |
XT10, XT15 |
| GSM/GPS combination radio |
RA3045-GPS |
XT15 only | |
| RFID | HF-AM1-OMNII RFID Reader | ST9210 | XT10, XT15 |
- scanner / imager options ?

POD
Scanners/imagers will be attached on the backside of the unit. Slim pot have
smaller form factor. POD-Scanner can be combinated with Speaker/Camera backcover
(ST9013):
|
Part.No.
|
Variant |
XT10
|
XT15
|
Engine
|
Range
|
Angle
|
Pistolgrip
|
|
ST9101
|
Scanner - short range |
yes
|
yes
|
SE1224HP |
85cm
|
42°
|
ST6000
|
|
ST9102
|
Scanner - long range |
yes
|
yes
|
SE1223LR |
600cm
|
47°
|
ST6000
|
|
ST9106
|
Imager 2D |
yes
|
yes
|
HHP5080 |
20cm
|
40°
|
ST6000
|
|
ST9107
|
Imager 1D |
yes
|
yes
|
EV15 |
90cm
|
40°
|
ST6000
|
|
ST9108
|
Imager 2D |
--
|
yes
|
EA11 |
44cm
|
39°
|
ST6000
|
|
ST9109
|
Imager 2D |
--
|
yes
|
EA20X |
80cm
|
26°
|
ST6000
|
|
ST9114
|
Imager 2D |
--
|
yes
|
SE4500 |
20cm
|
40°
|
ST6000
|
|
ST9204
|
Scanner - slim pod |
yes
|
yes
|
SE955 |
88cm
|
48°
|
ST6000
|
|
ST9208
|
Imager 2D - slim pod |
--
|
yes
|
EA11 |
44cm
|
39°
|
ST6000
|
|
ST9209
|
Imager 2D- slim pod |
--
|
yes
|
EA20X |
80cm
|
26°
|
ST6000
|
|
ST9214
|
Imager 2D - slim pod |
--
|
yes
|
SE4500 |
20cm
|
40°
|
ST6000
|
Backcover
Scanners/imagers will be simply exchanged with the back cover. So it can not
be combinated with Speaker/Camera (ST9004/ST9013).
Freezer Variants have heated scan window and can be used with freezer variant
XT15f only.
|
Part.No.
|
Variant |
XT10
|
XT15
|
Engine |
Range
|
Angle
|
Pistolgrip
|
|
ST9701
|
Scanner - short range |
yes
|
yes
|
SE1224HP |
85cm
|
42°
|
ST6100
|
|
ST9702
|
Scanner - long range |
yes
|
yes
|
SE1223LR |
600cm
|
47°
|
ST6400
|
|
ST9703
|
Scanner - auto range |
yes
|
yes
|
SE1524ER |
250cm
|
13°
|
ST6400
|
|
ST9706
|
Imager 2D |
yes
|
yes
|
HHP5080 |
20cm
|
40°
|
ST6100
|
|
ST9707
|
Imager 1D |
yes
|
yes
|
EV15 |
90cm
|
40°
|
ST6100
|
|
ST9708
|
Imager 2D |
--
|
yes
|
EA11 |
44cm
|
39°
|
ST6100
|
|
ST9709
|
Imager 2D |
--
|
yes
|
EA20X |
80cm
|
26°
|
ST6100
|
|
ST9710
|
Scanner - freezer |
--
|
XT15f
|
SE965 |
518cm
|
47°
|
ST6500
|
|
ST9711
|
Scanner - freezer |
--
|
XT15f
|
SE1524ER |
250cm
|
13°
|
ST6500
|
|
ST9714
|
Imager 2D |
--
|
yes
|
SE4500 |
20cm
|
40°
|
ST6100
|
|
ST9715
|
Imager 2D |
--
|
yes
|
SE4600 |
50cm
|
40°
|
ST6500
|
|
ST9716
|
Imager 2D - freezer |
--
|
XT15f
|
SE4600 |
50cm
|
40°
|
ST6500
|
Endcap
Scanners/imagers will be attached on the top end of the unit by simple replacement
of the endcap. So it can be combinated with Speaker/Camera (ST9004/ST9013).
Combination with pistolgrip is not possible. Depending on your installed GPS/GSM
radio, you need endcap with antennas included:
If you have GPS radio RA3060 installed, choose endcap ST94xx.
If you have GSM/EDGE radio RA3045 installed, choose endcap ST95xx.
If you have GSM/HSPA radio RA3050 installed, choose endcap ST96xx.
|
Part.No.
|
Variant |
XT10
|
XT15
|
Engine |
Range
|
Angle
|
Antennas
|
|
ST9304
|
Scanner | SE955 |
88cm
|
48°
|
-
|
||
|
ST9307
|
Imager 1D | EV15 |
90cm
|
40°
|
-
|
||
|
ST9308
|
Imager 2D | EA11 |
44cm
|
39°
|
-
|
||
|
ST9309
|
Imager 2D | EA20X |
80cm
|
26°
|
-
|
||
|
ST9314
|
Imager 2D | SE4500 |
20cm
|
40°
|
-
|
||
|
ST9400
|
- | - |
-
|
-
|
GPS
|
||
|
ST9404
|
Scanner | SE955 |
88cm
|
48°
|
GPS
|
||
|
ST9407
|
Imager 1D | EV15 |
90cm
|
40°
|
GPS
|
||
|
ST9408
|
Imager 2D | EA11 |
44cm
|
39°
|
GPS
|
||
|
ST9409
|
Imager 2D | EA20X |
80cm
|
26°
|
GPS
|
||
|
ST9414
|
Imager 2D | SE4500 |
20cm
|
40°
|
GPS
|
||
|
ST9500
|
- | - |
-
|
-
|
EDGE & GPS
|
||
|
ST9504
|
Scanner | SE955 |
88cm
|
48°
|
EDGE & GPS
|
||
|
ST9507
|
Imager 1D | EV15 |
90cm
|
40°
|
EDGE & GPS
|
||
|
ST9508
|
Imager 2D | EA11 |
44cm
|
39°
|
EDGE & GPS
|
||
|
ST9509
|
Imager 2D | EA20X |
80cm
|
26°
|
EDGE & GPS
|
||
|
ST9514
|
Imager 2D | SE4500 |
20cm
|
40°
|
EDGE & GPS
|
||
|
ST9600
|
- | - | - | - |
HSPA+ & GPS
|
||
|
ST9604
|
Scanner | SE955 |
88cm
|
48°
|
HSPA+ & GPS
|
||
|
ST9607
|
Imager 1D | EV15 |
90cm
|
40°
|
HSPA+ & GPS
|
||
|
ST9608
|
Imager 2D | EA11 |
44cm
|
39°
|
HSPA+ & GPS
|
||
|
ST9609
|
Imager 2D | EA20X |
80cm
|
26°
|
HSPA+ & GPS
|
||
|
ST9614
|
Imager 2D | SE4500 |
20cm
|
40°
|
HSPA+ & GPS
|
- keyboard options ?
 The Omnii XT10, XT15 offers a lot variants of keyboards. These are easily changeable
from end-user. For an overview please see here: KEYBOARD.
The Omnii XT10, XT15 offers a lot variants of keyboards. These are easily changeable
from end-user. For an overview please see here: KEYBOARD.
Psion Art.No. starting with ST50xx are complete kits containing keypad, electronic
board, bezel and labels. Best used to change a non-funcion keyboard or when
changing to abother variant.
Psion Art. No. starting with ST51xx are the keypad only (also called "elastomere").
Best used to change a worn keyboard with the same variant. For switching the
variant you need the kit.
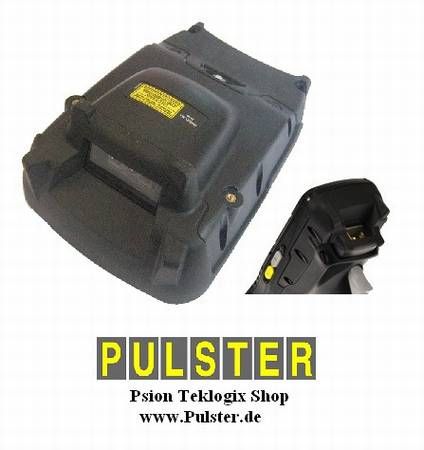
- automotive options ?
 1. Cradles: if you need a simple vehicle cradle, choose the non-powered cradle
ST1000. This cradle provides access to all keys and buttons while the Omnii
is docked in the vehicle. However if you want to charge your unit with the onboard
power, choose powered cradle ST1002. You can attach cradle ST1002 with the cable
CA3000 directly to your onboard vehicle power.
1. Cradles: if you need a simple vehicle cradle, choose the non-powered cradle
ST1000. This cradle provides access to all keys and buttons while the Omnii
is docked in the vehicle. However if you want to charge your unit with the onboard
power, choose powered cradle ST1002. You can attach cradle ST1002 with the cable
CA3000 directly to your onboard vehicle power.
In case you need data communication as well, use cradle ST1002 together with
adapter cable CA3001. This combination offers a serial and a USB port. Besides
you can charge the Omnii unit via Cigarette Lighter adapter (CLA) with cable
CA3002, or via onboard power with cable CA1210.
2. If you don't need a holder / cradle inside your vehicle, but just a charging solution, use adapter clip WA4000 with CLA power adapter ST3113.
3. Mounts: To attach the cradle to the vehicle we suggest a RAM mount MT332x,
MT350x.
4. Power regulator: - Power supplies exceeding 30VDC (forklift power) need PS1350
"72V pre regulator module"
5. Handstrap: units with attached handstrap ST6026 or pistolgrip ST6x00 also
fit in the vehicle cradle. Only cases have to be removed.
- stylus options ?
 Standard stylus can be ordered as spare part: ST6101 (short, yellow) or ST6102
(long, grey).
Standard stylus can be ordered as spare part: ST6101 (short, yellow) or ST6102
(long, grey).
The Omnii has no internal stylus holder, so it has to be attached externaly:
option 1: via stylus holder ST6310 or tether ST6103 - this holder and/or the
tether allows to attach a stylus on the back of the Omnii unit.
option 2: via handstrap ST6026 - a stylus can be attached with tether (ST6103)
to this handstrap, which has also two stylus holders.
option 3: via pistolgrip ST6000, ST6100 with integrated stylus in the bottom
of the handle.
- protective options ?
Screen: to avoid scratches on the touchscreen from heavy-duty stylus input, you can attach a screen protection ST6112.
Handstrap: The handstrap will be attached on the backside of the unit and provides secure hold with one hand. ST6025 is adjustable in lenght, ST6026 is suitable with use of vehicle holders ST1000 + ST1002. - a shoulderstrap can be ordered as ST6030, a wriststrap as ST6040.
Case: a variety of protective pouches, belt-cases and rubber boot protections are available:
| Case / Pouch |
Picture (click to view) |
Type | Extras | accessible parts | Variants |
|
ST6090 ST6092 |
 |
Carrying Case, Nylon |
- removeable belt clip. So it can be used as simple protective pouch
or as belt-case |
Display, Keypad, Camera, buttons on the sides. | ST6090 for units with Backcover-Scanners (ST930x,
ST940x, ST950x, ST970x) ST6092 for units with Pod-Scanners (ST910x, ST920x). |
|
ST6091 |
 |
Pouch, Nylon |
- removable belt clip. So it can be used as simple protective
pouch or as belt-case. - ashoulderstrap can be attached (order separately). |
||
|
ST6080 ST6081 |
 |
Rubber Boot | - two connections for shoulderstrap (not included). |
Scanner, Stylus and battery are still accessible. For charging in the docking it must be removed. |
ST6080 (yellow) and ST6081 (grey) for units with Backcover-Scanners (ST930x, ST940x, ST950x, ST970x). ST6084 (yellow). ST6085 (grey) for units with Pod-Scannerns (ST910x, ST920x) |
| ST6055 ST6056 |
 |
Holster, Cordura | - Combination with pistolgrip, Left/right-hand use. |
ST6055 for units with Backcover-Scanners (ST930x, ST940x, ST950x, ST970x). ST6056 for units with Pod-Scanners (ST910x, ST920x) |
|
| ST6050 |
 |
Vehicle Holster | - Vertical and horizontal position possible, works with units with pistol grip. | ||
| ST6051 |
 |
Forklift Holster | - Vertical and horizontal position possible,
works with units with pistol grip. |
- Can I upgrade my unit with a camera ?
You need a backcover with camera/speaker: ST9013, besides a pod blanking plate
ST9100 and endcap blank ST9301.
The camera has 3 MPixel, 4x digital zoom, autofocus, LED flash and is video
capable.
Please note, you can combinate with the camera only POD-scanners or endcap-scanners,
no backcover scanners.
- memory options ?
The internal memory (ROM / Flash-RAM) can not be upgraded. However the memory
can be expanded with a microSD memory-card. The slot for SD-cards is easily
accessible via battery compartment. Another internal microSD-slot is for system
purposes only, please do not remove card, otherwise unit will not boot.
F.A.Q. - for Omnii users:
- My unit does not power on ?
1. Try a soft/warm reset first (see below).
2. Check if battery is charged well (otherwise blinking yellow LED). Units with
low battery does not power up. Place unit in the desktop docking cradle. Check
if battery is inserted and compartment is closed properly, otherwise it won't
charge on the docker.
3. Finally try a hard/cold reset (see below).
4. If all solutions fail and unit remaind "dead", please contact vendor/manufatorer
for service.
- How to reset the unit ?
1. Soft/Warm reset: factory settings are retained, but any unsaved personal
data is lost. Press and hold ENTER + FN/BLUE simultaneosly 4 seconds.
2. Hard/Cold reset: returns the unit to factory settings, all datas are lost
! - Press and hold ENTER + FN/BLUE + SYM/ORANGE simultaneosly 4 seconds.
3. Booting in system-menu ("BooSt"): Press and hold ENTER + FN/BLUE
+ SCANNER button left simultaneosly 4 seconds. After you can "clean start"
unit, which resets the unit 100% to factory settings.
None of these reset-options erases OS system, so you will never be left with
a non-working unit.
- How to connect the Omnii with the PC ?
Software: Windows 7 + Vista users require Windows Mobile Device Center,
Windows 2000 + XP users require ActiveSync. Download
links.
Running Active Sync with Windows XP, please check you have admin rights, firewall
settings, active DHCP-client, active Netbios over TCP/IP.
Most connection problems with Windows 2000/XP are gone if you install USB drivers:
USB
Setup application (PTX P/N: 1000997).
Hardware:
Option 1: docking station ST4002, ST4003: the docked Omnii connects via USB
to any desktop PC. Besides there is a USB Host port.
Option 2: snap module ST4001 - this adapter clip provides a micro-USB port to
communicate via linkcable (PX3058) with a PC. Also charging the unit via this
USB port is possible. Besides it provides a standard USB port to connect external
devices
- Scanner/imager does not work properly ?
1. Hardware: please attach scanner/imager modul as shown in the instruction
manuals: backplate-scanner
(link) or Pod-scanner
(link).
2. Software: Check your Psion product number and see on table on top what scan-engine
is used. For example: Scanner ST9101 = engine SE1224HP or Imager ST9107 = engine
EV15. The system should auto-detecte the scanner type, check it in the Windows
System settings. (there is no BooSt scanner setting available with Omnii).
3. Some imagers require additional .cab drivers to work with Omnii units. Please
download drivers here: ICS
Device Installer.
4. If red laser light show up, the hardware is installed properly. Try simple
EAN code first, vary with scan distances.
- What Hardware Expansions are available ?
| Art.No. | Product | Picture (please click) |
Info |
|
ST9002 |
Expansion Backcover |
 |
Pod-Scanners can be installed on top of this. ST9002, former ST9000: blank backcover (no speaker, no camera included).
|
|
ST930x |
End Caps | ||
| to be continued |
- What spare parts are available ?
| Art.No. | Product | Picture (please click) |
Info |
| ST9301 | End Cap Blank |
 |
blank endcap which covers top of back covers ST90xx. |
| ST9100 | Pod blanking plate | blank backplate to cover back of back covers ST90xx. | |
| ST50xx | Keyboards | ||
| ST51xx | Keypads | ||
| to be continue |
tbc = to be continued, corrections welcome: christoph@pulster.de
![]()
© EDV Pulster, Germany - www.pulster.de - info@pulster.de