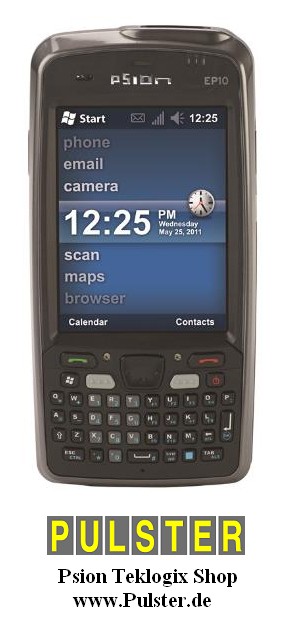
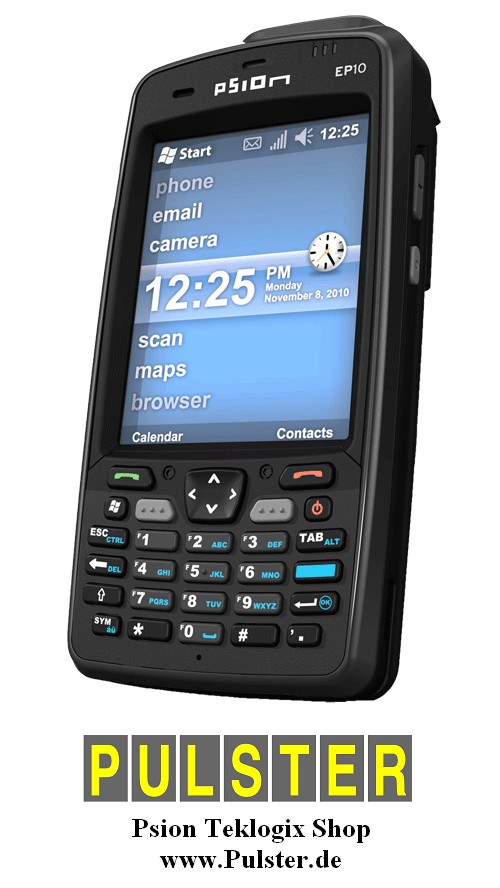
Psion EP10
FAQ - Frequently asked questions
© EDV Pulster, Germany - www.pulster.de - info@pulster.de
|
|
- What variants of the EP10 are available ?
|
|
 |
|
| Keyboard |
alphanumeric QWERTY (optional AZERTY)
|
numeric
|
| Imager |
available with and without 2D Imager
|
available with and without 2D Imager
|
- What are the main specifications ?
|
EP10 |
|
| Hardware |
CPU: 800Mhz ARM, Memory: 2 GB Flash ROM / 256 MB SDRAM, display: 3.7inch
VGA, |
| Software |
Windows
Embedded 6.5 - English, French, German, Spanish, Portugese, Italian,
Chinese and Japanese - |
| Size | dimensions: c.16 x 8 x 3 cm, weight: 340g with battery |
| Scanner | The EP10 is available with and without 2D imager option. Units with imager have engine Intermec EA11 built in, specification link. It is not possible to change scan engine by user. A Pistolgrip is not available. |
| Camera | 3.2 Mega Pixel, Auto Focus, LED Flash, Video capture |
| WiFi | onboard 802.11a/b/g/n, WPA2 |
| GSM | UMTS 3.8G HSPA+ (5-Band), besides CDMA dual band version available |
| Bluetooth | v 2.0, EDR |
| GPS | SiRFstar IV, A-GPS |
| input options |
It is possible to navigate and use the EP10 with finger input (smartphone
style). Besides a standard stylus can be used (RV6101), which fits in
the stylus slot of the EP10 unit or can be attached outside the unit with
the included tether. |
| Features |
Accelerometer, Compass, Gyroscope, Light Sensor, Proximity Sensor, Speaker, Micro, microSD slot |
| IP rating | IP 54 - rain and dust protection |
| SUMMARY |
+ all up-to-date technologies already on-board |
-Where can I find more informations about the Psion EP10 ?
Full specification sheet: Link , user product guide Link user manual: link and helpful video documentations: link. More infos on Zebra Support.
- what do I need to start with ?
The EP10 comes with battery (RV3005 or RV3010), handstrap and tethered stylus. For start working with the unit you need at least a charging option, see below please.
 -
charging options ?
-
charging options ?
There is no power port on the EP10, so you can not simply plug a power adapter on it. Choose one of these options to connect power adapter PS1050 (wall) or RV3050 (vehicle with CLA-plug) to the EP10:
| Adapter Cable RV6005 |
To connect a power adapter directly to the EP10 use charger cable adapter RV6005. |
|
Adapter Snap On |
These adapter clips provide a charging port for the unit.You can connect a power adapter directly to these snap-on adapters. |
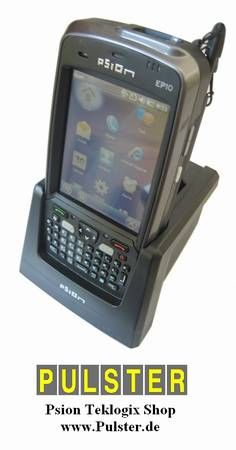
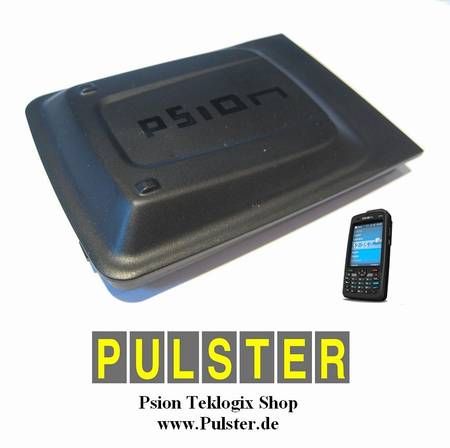
| Docking station RV4000, RV4004 | The desk docking stations can charge the battery inside the unit as well charge a spares battery in a second slot. Single unit docker is RV4000, quad-unit docker is RV4004. |
| Battery charger RV3004 |
You can charge up to four batteries externally with it. A wall mount (RV3007) for this charger is available. |
| Vehicle charging options RV1005 | The powered Vehicle Cradle RV1005 provides a charging port.
You can connect a power adapter directly to this cradle. Inside vehicle
it is common to use the vehicle power adapter RV3050 with cigarette-lighter-adapter
(CLA) plug. A second option is to use the non-power vehicle cradle RV1000 together with adapter cable RV6005 (see 1. on top) to connect a power adapter to the unit. |
- battery options ?
 EP10
has two Lithium-Ion battery options:
EP10
has two Lithium-Ion battery options:
1. Standard battery RV3005 with 2400mAh
2. High capacity battery RV3010 with 3600mAh.
Charging time is 3.5h, working time 8-12 hours (depending on usage) and 50 hours
suspend time. Life time of battery is 3 years/300 charging cycles.
Besides the EP10 has a backup battery. It will remain data while replacing main
battery. It is soldered to mainboard and not user-changeable.
You can extend battery life configuring power management
accordingly (/Start/Settings/ControlPanel/Display & Power): suspend power
settings, reduce backlight, keypad brightness. If not needed, disable Bluetooth,
GSM/GPRS, SD-Card Slot. Teklogix recommends to use default power managment settings
to get the best battery life.
- wired communication options ?
| USB |
Option 1: docking station RV4000: the docked EP10 connects via USB to
any desktop PC. Option 2: snap module RV4001 - this adapter clip provides a micro-USB port to communicate via adapter (PX3053) with a PC. |
| USB Host |
Option 1: snap module RV4001 - this adapter clip provides USB On-The-Go port to connect external devices. |
| Ethernet |
Option 1: quad docking Station RV4004 provides 10/100 Base-T Ethernet port. Option 2: adapter PX3052 - it will be attached to the USB-port of the single dockingstation and will provide an Ethernet port. |
| serial RS232 |
Option 1: snap module RV4002 - this adapter clip provides a serial DB9 port. It can be used for data communication as well as for charging the unit with power adapter (PS1050/RV3050). |
- wireless communication options ?
| Technology | Psion part no. | suitable for EP10 | |
| GSM |
UMTS 3.8G HSPA+ (5-Band), besides CDMA dual band version available |
- |
onboard |
| Wifi | 802.11a/b/g/n, WPA2 | - | onboard |
| Infrared | none | - | none |
| Bluetooth | V2.0 + EDR, coexistence with Wifi | - | onboard |
| GPS | SiRFstar IV, A-GPS | - | onboard |
| RFID | RFID Snap-On adapter available from VAR | - | optional |
- automotive options ?
 1. Cradles: if you need a simple vehicle cradle, choose the non-powered cradle
RV1000. This cradle provides access to all keys and buttons while the EP10i
is docked in the vehicle. However if you want to charge your unit with the onboard
power, choose powered cradle RV1005. You can attach cradle RV1005 with the CLA-power-adapter
RV3050 directly to your onboard vehicle power. Besides USB-communciation is
possible.
1. Cradles: if you need a simple vehicle cradle, choose the non-powered cradle
RV1000. This cradle provides access to all keys and buttons while the EP10i
is docked in the vehicle. However if you want to charge your unit with the onboard
power, choose powered cradle RV1005. You can attach cradle RV1005 with the CLA-power-adapter
RV3050 directly to your onboard vehicle power. Besides USB-communciation is
possible.
2. If you don't need a holder / cradle inside your vehicle, but just a charging solution, use CLA power adapter RV3050 with adapter clip RV4001 or RV4002. It is possible to attach CLA power adapter to the onboard power with adapter RV1205.
3. Mounts: To attach the cradle to the vehicle we suggest a RAM mount WA3006
(screw attachment) or RAM-B-166-202U "Suction Cup Mount".
- protective options ?
Screen: to avoid scratches on the touchscreen from heavy-duty stylus input, you can attach a screen protection RV6105.
Handstrap: The handstrap RV6021 will be attached on the backside of the unit and provides secure hold with one hand.
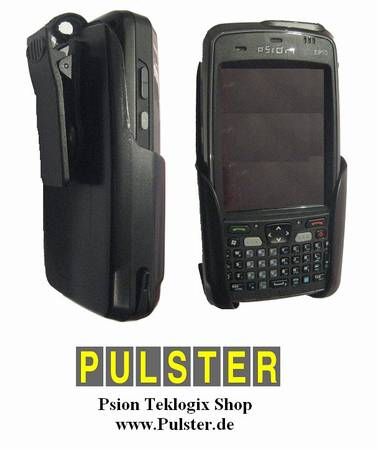
Case: only two belt pouchs are available so far (2013):
| Case / Pouch |
Picture (click to view) |
Type | Extras | accessible parts |
|
RV6091 |
 |
Belt holster, Leather |
- belt- clip (not removable) |
all once token out of the pouch of course :-) |
|
RV6092 |
 |
Belt holster, Plastic |
- belt- clip (not removable) |
Unit is useable also left in the pouch ! |
F.A.Q. - for EP10 users:
- My unit does not power on ?
1. Try a soft/warm reset first (see below).
2. Check if battery is charged well: red LED indicates faulty battery/charger,
blinking yellow LED indicates low battery charge. Units with too low battery
does not power up. Place unit in the desktop docking cradle. Check if battery
is inserted properly, otherwise it won't charge on the docker.
3. Finally try a hard/cold reset (see below).
4. If all solutions fail and unit remaind "dead", please contact vendor/manufacturer
for service.
- How to reset the unit ?
1. Soft/Warm reset: factory settings are retained, but any unsaved personal
data is lost. Press and hold POWER + BLUE simultaneosly 4 seconds.
2. Hard/Cold reset: returns the unit to factory settings, all datas are lost
! - Press and hold POWER + BLUE + SYM simultaneosly 4 seconds.
3. Clean start: to reset the unit 100% to factory settings, press POWER + BLUE
+ left Scannerbutton simultaneosly 4 seconds. The EP10 shows then a system-menu
("BooSt"). Choose option "clean start", typing ".clean"
on alphanumeric units and ".25326" on numeric units (please mind the
starting point before).
None of these reset-options erases OS system, so you will never be left with
a non-working unit. But please note a CleanStart disables the Imager and makes
new installation of drivers necessary.
- How to connect the EP10 with the PC ?
Software: Windows 7 + Vista users require Windows Mobile Device Center,
Windows 2000 + XP users require ActiveSync. Download
links.
Running Active Sync with Windows XP, please check you have admin rights, firewall
settings, active DHCP-client, active Netbios over TCP/IP.
Most connection problems with Windows 2000/XP are gone if you install USB drivers:
USB
Setup application (PTX P/N: 1000997).
Hardware:
Option 1: docking station RV4000: the docked Omnii connects via USB to any desktop
PC.
Option 2: snap module RV4001 - this adapter clip provides a micro-USB port to
communicate via adapter (PX3053) with a PC.
- Imager does not work properly ?
Please download and install 1. the ADD ON Software Pack and 2. the .cab drivers
for the imager. (due to copyright issues these drivers cant be linked here).
If imager light show up, the hardware is installed properly. Try simple EAN
code first, mind the scan ankle and maximum scan distances of c. 40cm.
- Unit is locked ?
To enable keyboard input, press SYM, BLUE, Back(space) one after another. ("Backspace"
is the arrow left symbol).
Default setting of screen lock is ON. To disable it, please go to: Start ->
Settings -> Personal -> Buttons -> Auto Lock, then remove cross from
the checkbox [ ] Lock when screen is covered. If you cant find this setting,
you need to install the Psion add-on-pack first.
Technical sidenote: the Psion EP10 has a light sensor on the upper frontside,
left to the PSION logo (you see a small hole in the case). If this is covered,
the system will automatically lock the device and bring up the lock icon. Now
if you move the device away from that object, the lock icon will disappear.
If you wish to verify the above, place / remove your thumb on / from the EP10
proximity and light sensor window
- What spare parts are available ?
| Art.No. | Product | Picture (please click) |
Info |
| 1100958 | EP10 Keyboard Upgrade Kit NUMERIC | For replacement of keyboard but also for chaning from alphanumeric to numeric keyboard - Video Tutorial LINK | |
| 1100957 | EP10 Keyboard Upgrade Kit Alphanumeric - QWERTY english | For replacement of keyboard but also for chaning from numeric to alphanumeric keyboard - Video Tutorial LINK | |
| 1100954 | EP10 Keyboard Upgrade Kit Alphanumeric - AZERTY french | For replacement of keyboard but also for chaning from numeric to alphanumeric keyboard - Video Tutorial LINK |
tbc = to be continued, corrections welcome: christoph@pulster.de
![]()
© EDV Pulster, Germany - www.pulster.de - info@pulster.de